Set up a private VPN service in 10 minutes
We take pride in extensive support for both Windows servers and Linux servers in Edora Cloud and Origo OS.
Running a single virtual server with a public IP, and using it as jump host to access potentially dozens of virtual servers with only internal IP addresses, is a very common way of running collections of Linux servers in cloud environments. This is practical because most Linux system administration is done using SSH.
For Windows servers the situation is a bit more complicated, because a lot of system administration is traditionally done using the Windows UI over RDP connections (aka Terminal Services). Using a Windows server as jump host by using nested RDP connections is of course possible, but really clunky. Instead many Windows shops choose to use a VPN connection to access their internal IP address space, and then connect directly to internal servers and services. In this post we will show you how to set up a VPN service in Edora Cloud, which can also double as firewall for your internal virtual servers.
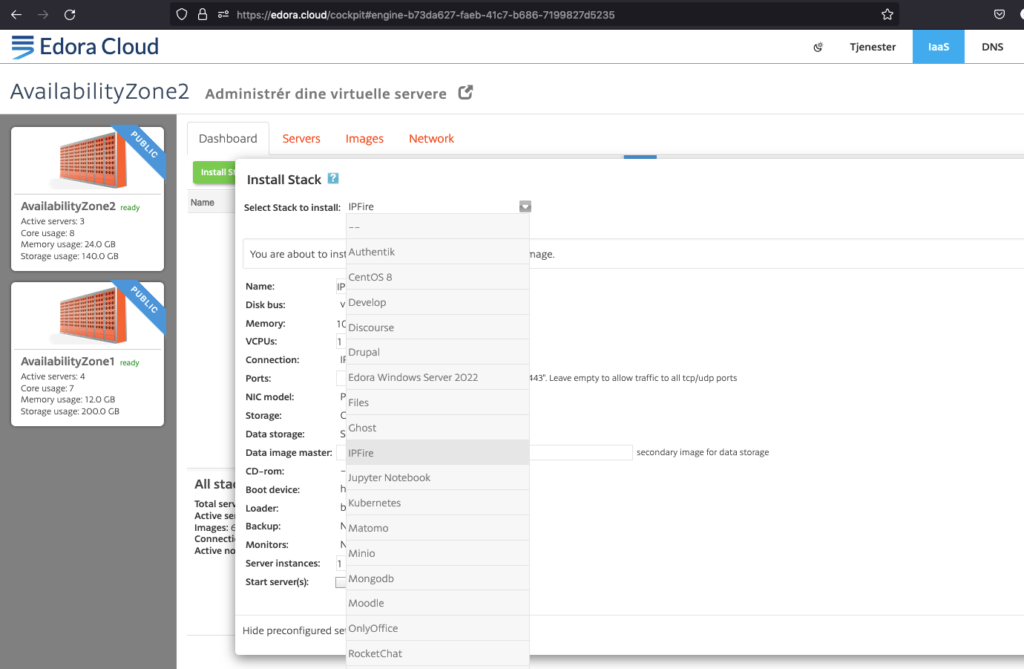
We have chosen IPFire for setting up a VPN service, because out of the box it provides a hardened Linux installation with OpenVPN, IPSec installed. It also comes with a nice UI (althoug a bit dated). We have downloaded the IPFire virtual image, converted it to qcow2 and made it available as a shared master image in Edora Cloud. To install a VM from a shared master image, switch to the IaaS tab in the UI, and click “Install Stack…”:
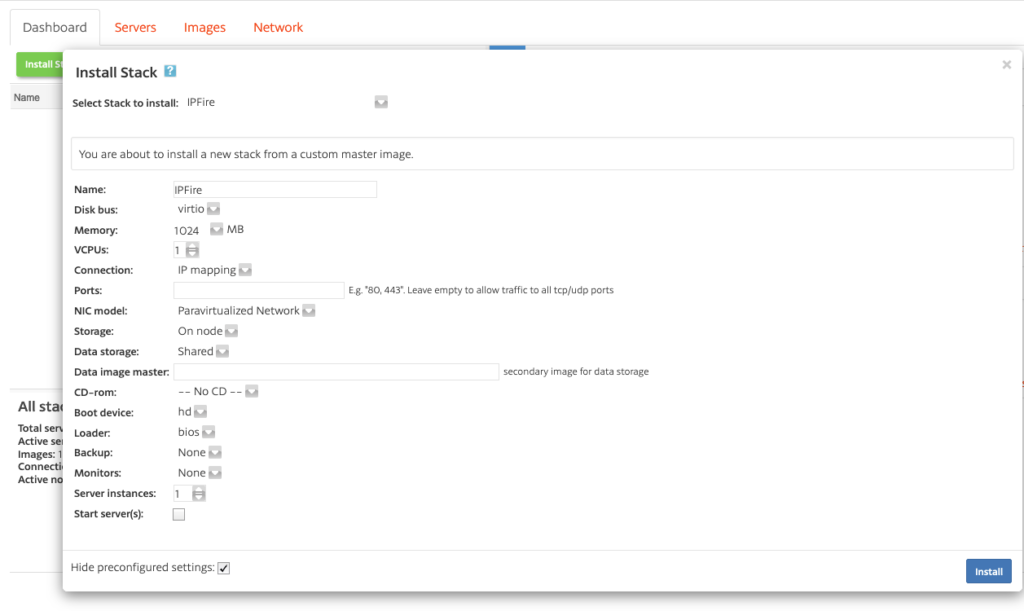
Select “IPFire”, and install with 1 vCPU and 1 GB memory, “internal ip address” (important), and leave “Start server(s)” unchecked, then click “Install”.
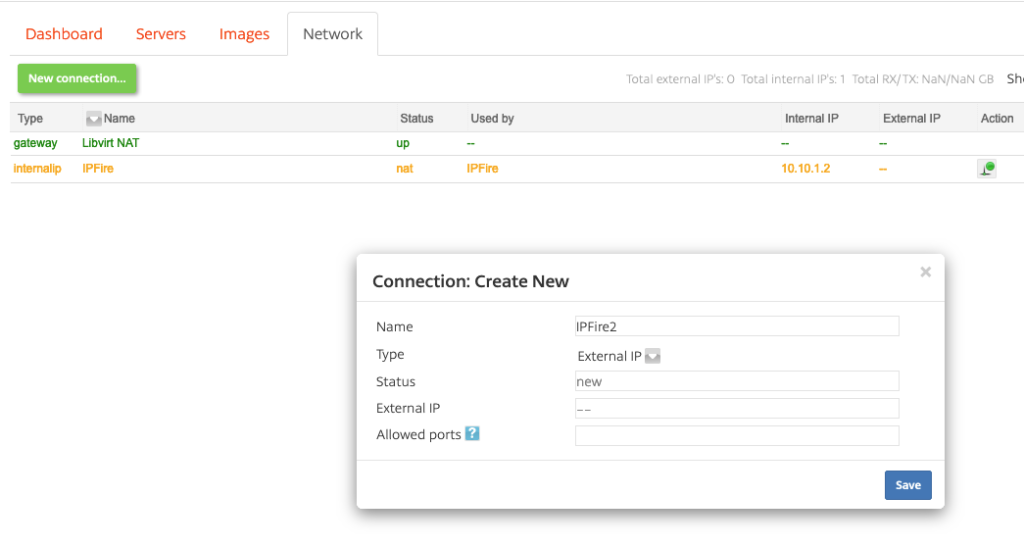
Next, head over to the “Network” tab, click “New connection…” and create an “External IP” connection.
After saving the connection, please note the external IP you were provided with.
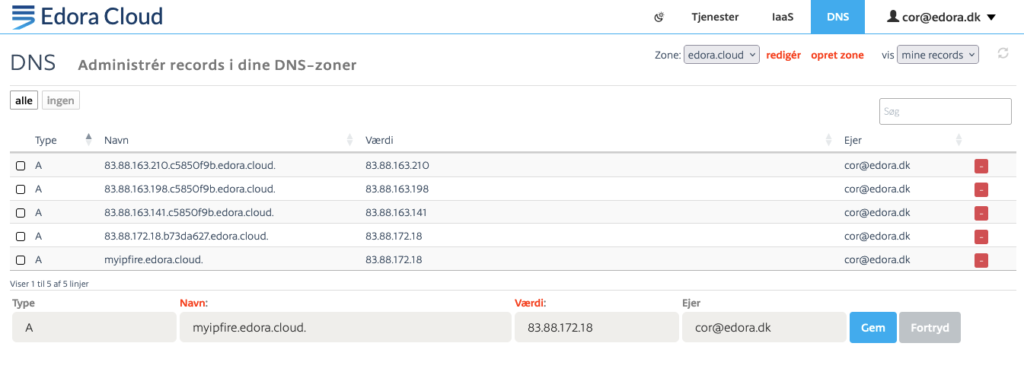
Now head over to the “DNS” tab and create an A-record with a name of your choosing (it must of course be available) and the IP address you just noted. The name will be the host name of your server. We assume that you are using the domain “edora.cloud”, but if you are using another domain, that is of course perfectly fine.
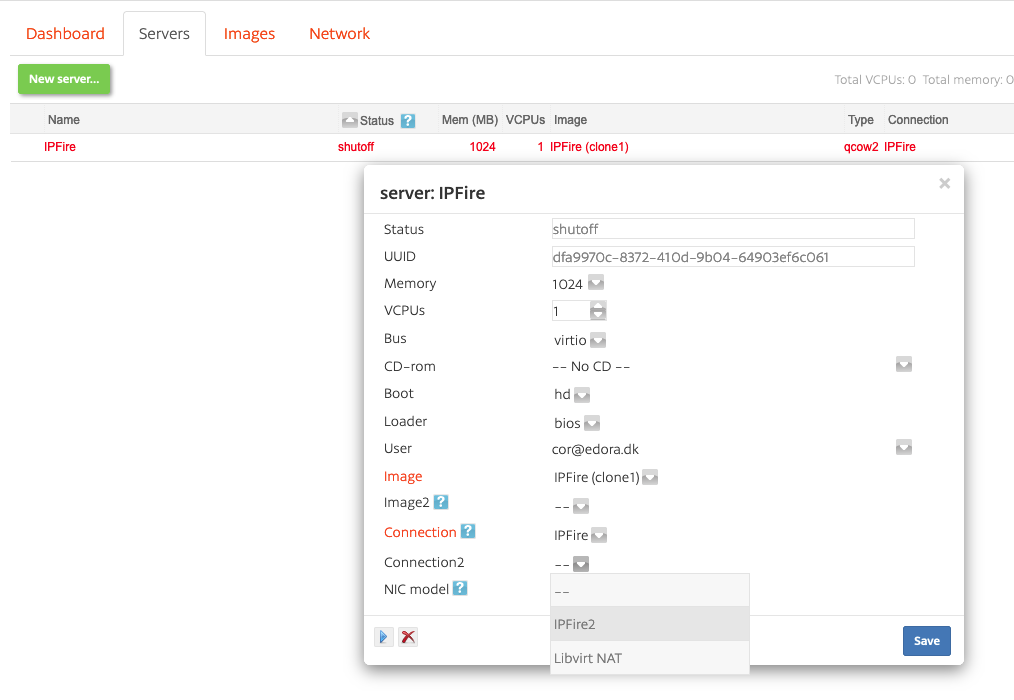
Then, switch to the “Servers” tab, add the connection you just created as “Connection2” to your IPFire server and start your server.
Launch the server’s console, wait for the server to complete booting, and complete the IPFire configuration wizard. Type in the name you chose as host name and “edora.cloud” (or whichever domain you are using) as domain name. “Network configuration type” is “GREEN + RED”. In IPFire jargon “GREEN” is the internal network and “RED” is the external network. In “Drivers and card assignments”, you should associate the first of your two virtual network cards with the GREEN interface and the other with the RED interface. Use the IP address of your “internal ip address” connection for the GREEN interface and select DHCP for the RED interface. Do not enable the DHCP server.


After completing the configuration wizard, wait for the server to reboot. Then log in as root with the password you just set. You must now type in two commands. The first is to temporarily allow access to the web admin interface from the Internet, the second is to allow access to your internal network after connecting over VPN:
iptables -A CUSTOMINPUT -p tcp --dport 444 -j ACCEPT
iptables -A POSTROUTING -tnat -o green0 -j MASQUERADE
You can now access the IPFire web UI at: https://<your-host-name>.edora.cloud:444
with username “admin” and the password you set in the wizard.
Please note that you should execute the second command after you reboot the server, in order for routing to work correctly for your VPN clients.
Putting this in a boot script like e.g. “/etc/rc.d/init.d/firewall” is left as an excercise 🙂
Let’s set up IPsec to allow VPN connections from macOS and Windows clients using IKEv2, which is built into modern versions of both operating systems.
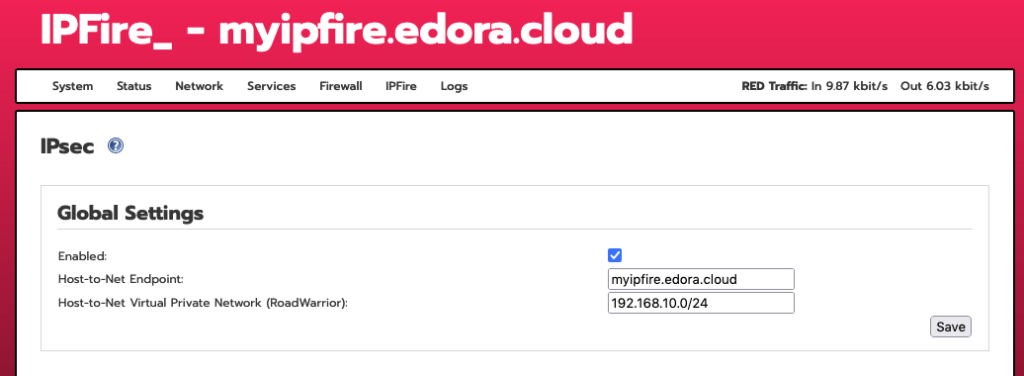
In the IPFire web UI, head to “Services -> IPsec” and begin by configuring “Global Settings” like this:
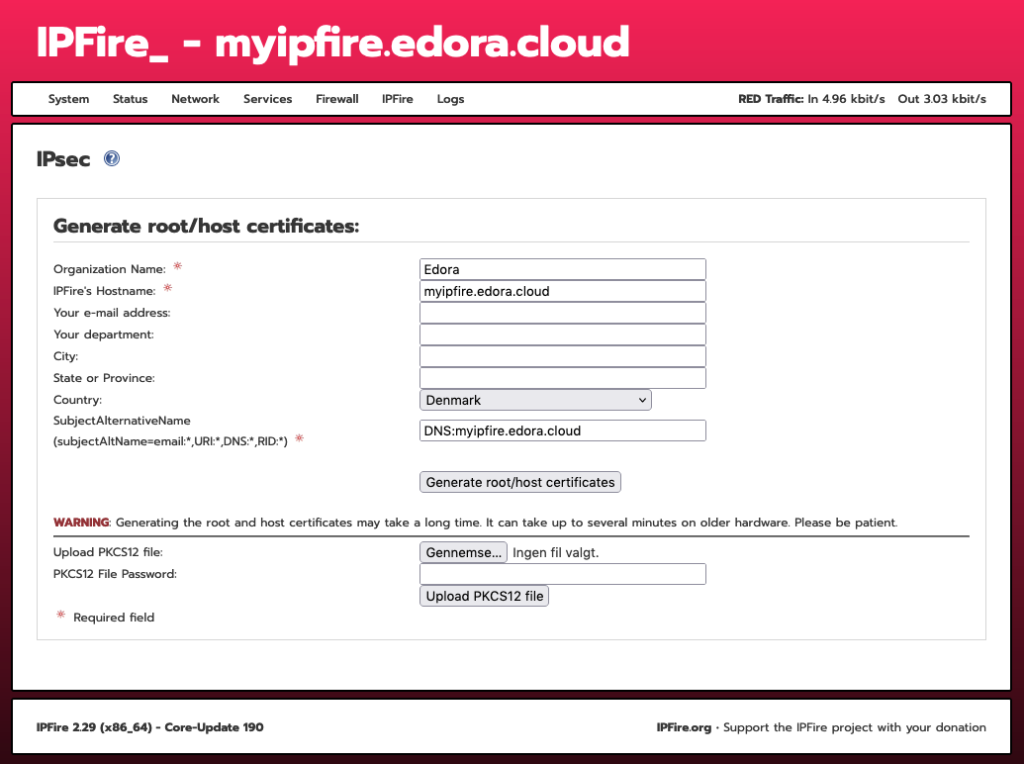
Then, click on the “Generate root/host certificates” button, fill in the form and click the “Generate root/host certificates” button.
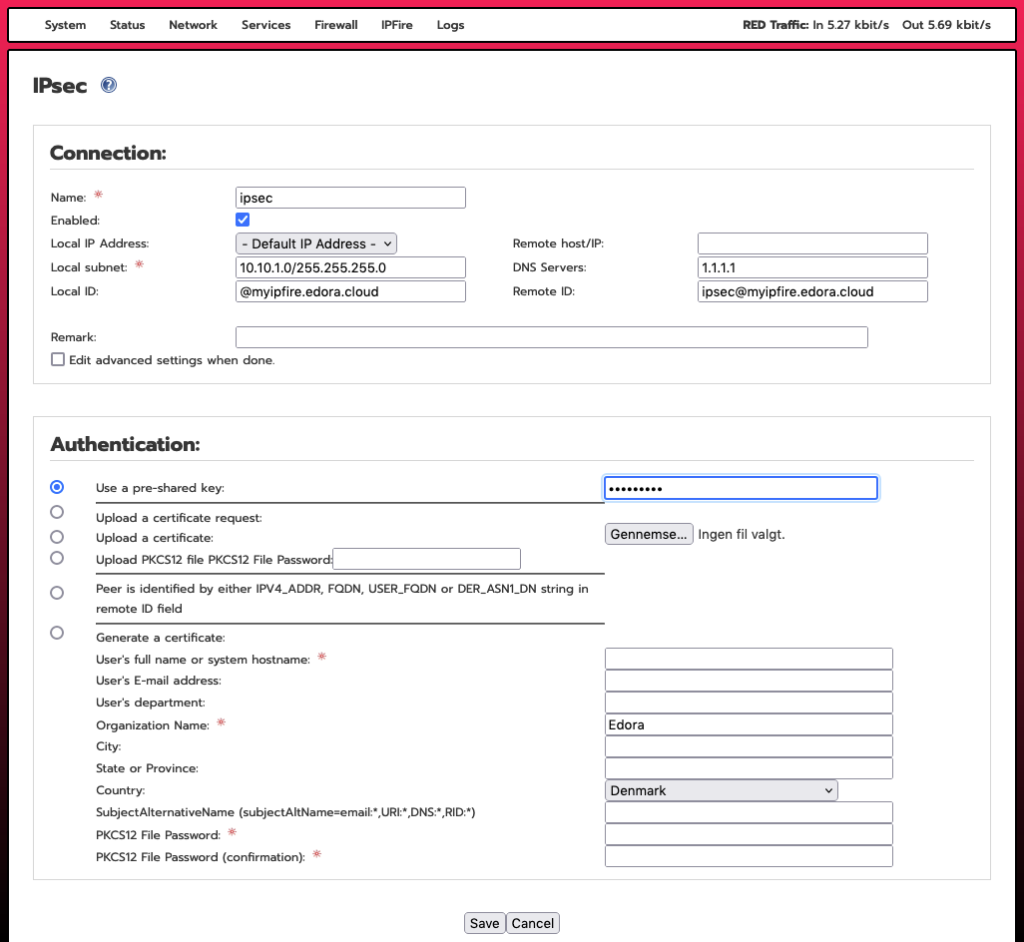
After generating the host certificates, click on the “Add” button. Next, select “Road warrior” and fill in the form as shown below, substituting your “myipfire” with your chosen host name (and “edora.cloud” with your domain name if using a custom domain). Type in a pre-shared key, and write it down somewhere – you will need this to create client configurations.
Your IPsec service should now be ready to use. To make a VPN connection from a Mac, launch “System Preferences”, go to “Network” configuration and add a new VPN connection like this:


You should now be able to click on “Connect” and establish a VPN connection.
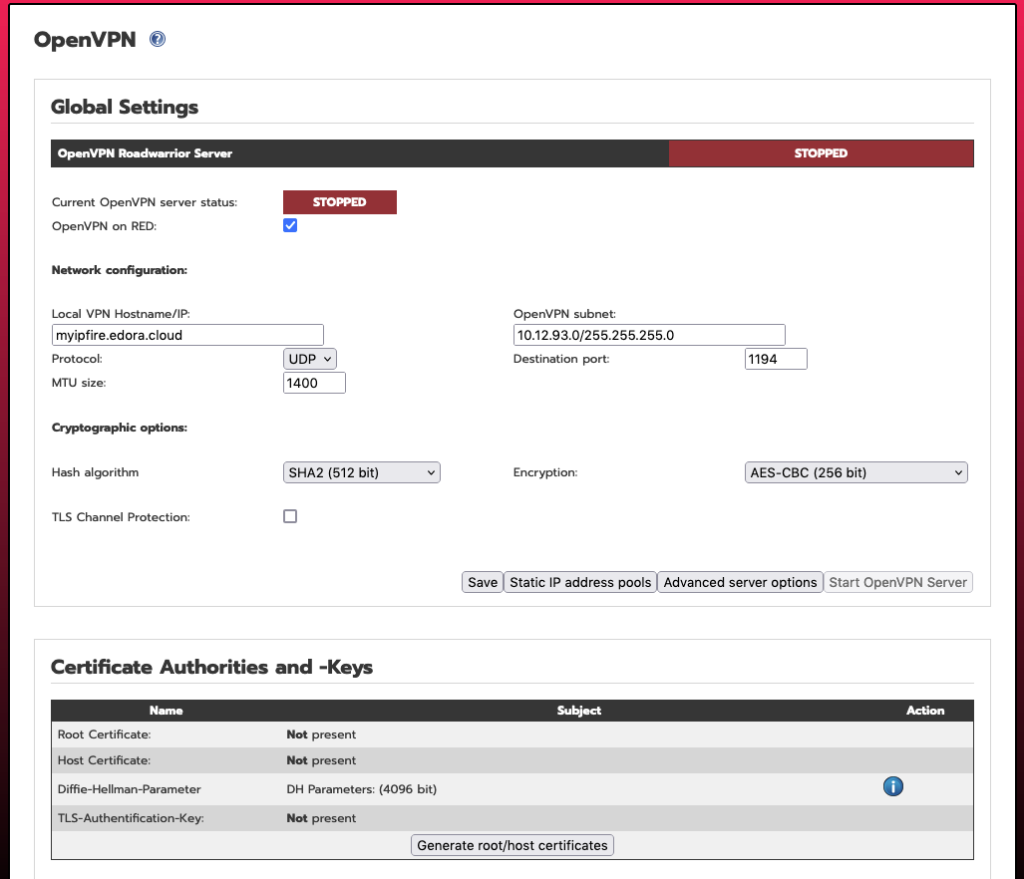
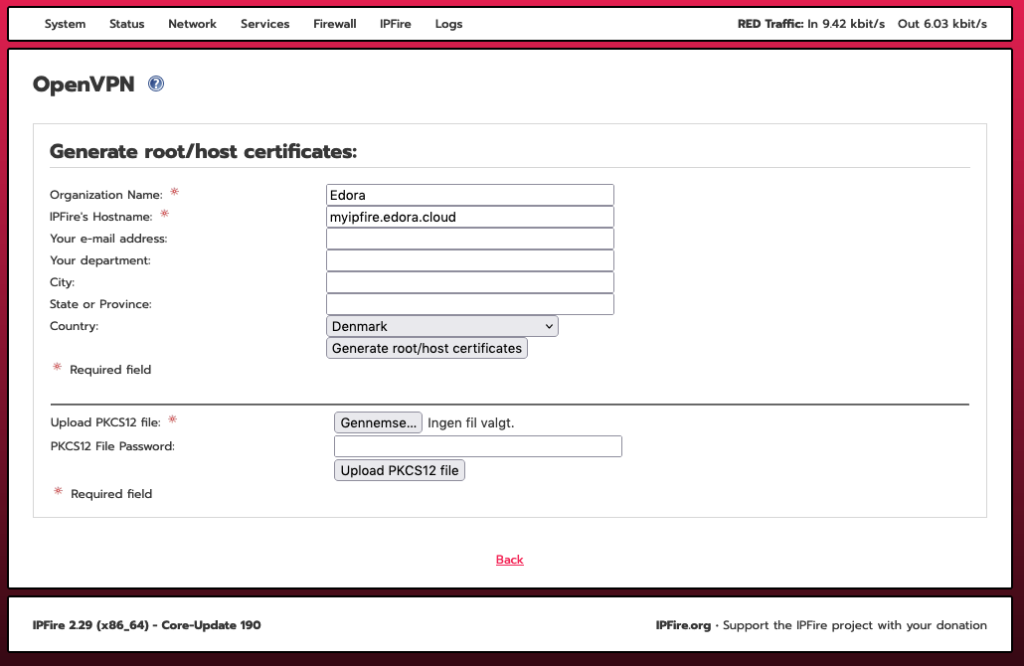
To also support OpenVPN clients, let’s enable and configure the OpenVPN service. Head over to “Services -> OpenVPN” and click on “Generate root/host certificates”:
Fill in the form and click “Generate root/host certificates”:
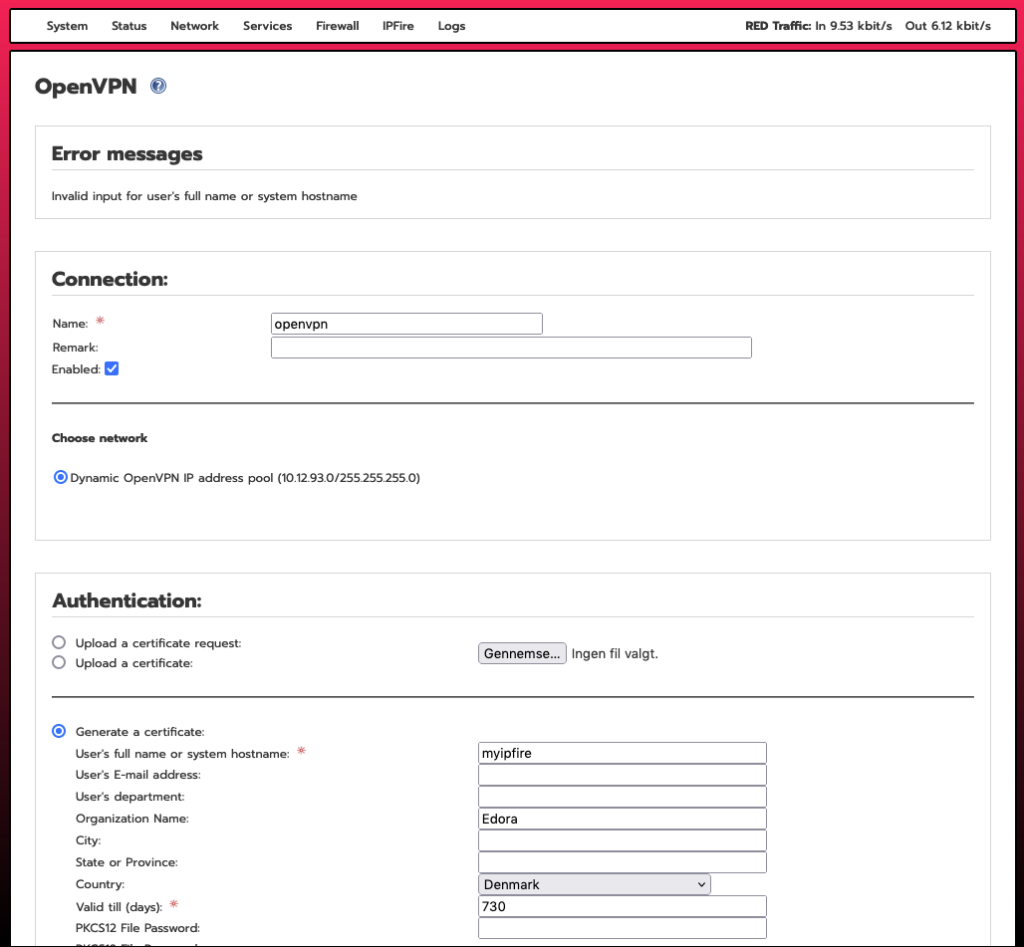
Next, click on “Add”, select “Road Warrior”, fill out the following form and click “Save”.
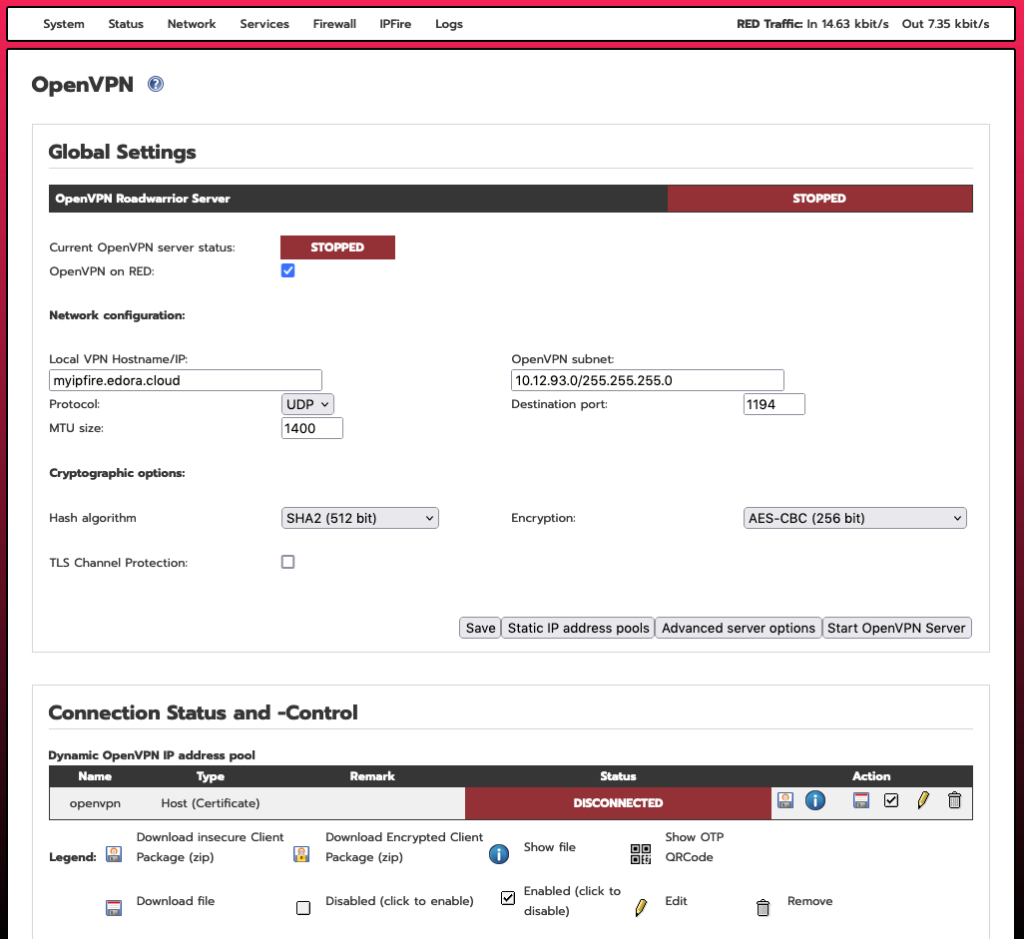
To start the OpenVPN server, click enable “OpenVPN” on RED, and click “SAVE”, then click the “Start OpenVPN Server” to start it, and you are done. You should download the OpenVPN configuration files, and import these in your OpenVPN client of choice, in order to make an OpenVPN connection.
Phew – that was a lot of click-ops to set up a simple thing like a VPN service and it might take longer than the promised 10 minutes. This is exactly why we package stuff like this in stacks, so they can be installed as a service with a single click. If you get tired just by looking at all the steps above and would like us to package this as a stack, please leave a comment below.
